Back to homepage
UX Case Study

Rebuilding an airline booking flow around what travelers actually need

An end-to-end redesign of an airline booking flow, from competitive research through to a tested, developer-ready prototype.

I picked this flow because everyone has a booking horror story. I wanted to understand why.

01 — Research

Competitive benchmarking

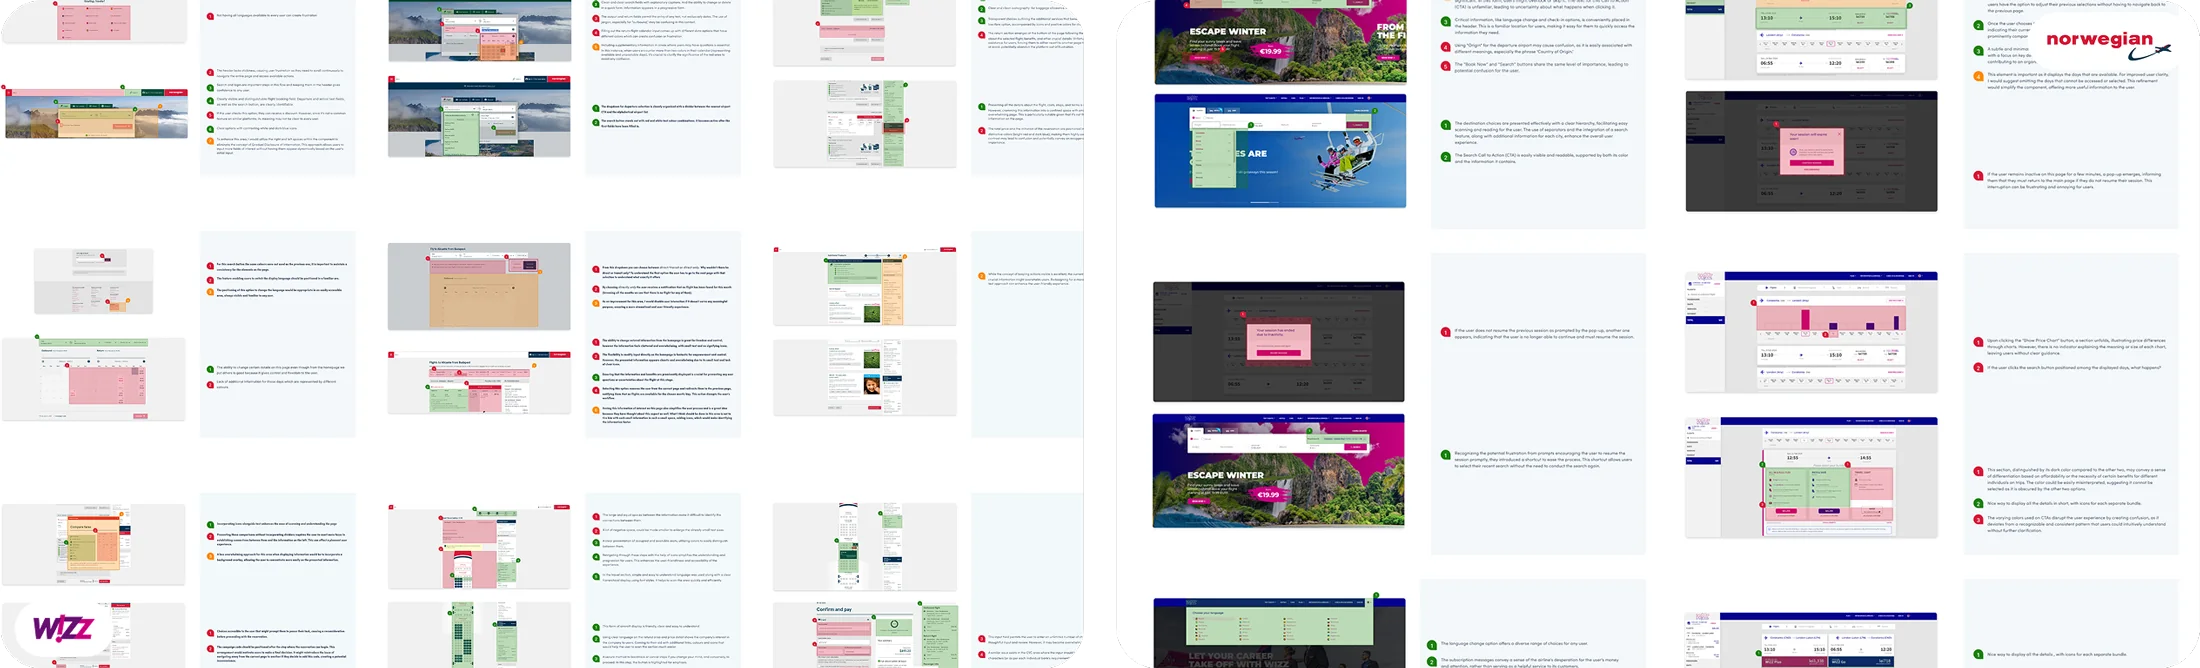
I start with competitive benchmarking. I look at other airline and booking apps, note what works, and note what doesn't. It's the fastest way to see what's already solved, so I don't waste time redoing it, and where the real opportunity is.

  • Green: Good solutions that can be adopted as they are.
  • Orange: Elements worth using but requiring an improved version.
  • Red: Problems in the screens that need to be addressed.
Side-by-side benchmarking board comparing Norwegian and Wizz Air booking screens, annotated green, orange and red
02 — Research

Note-taking

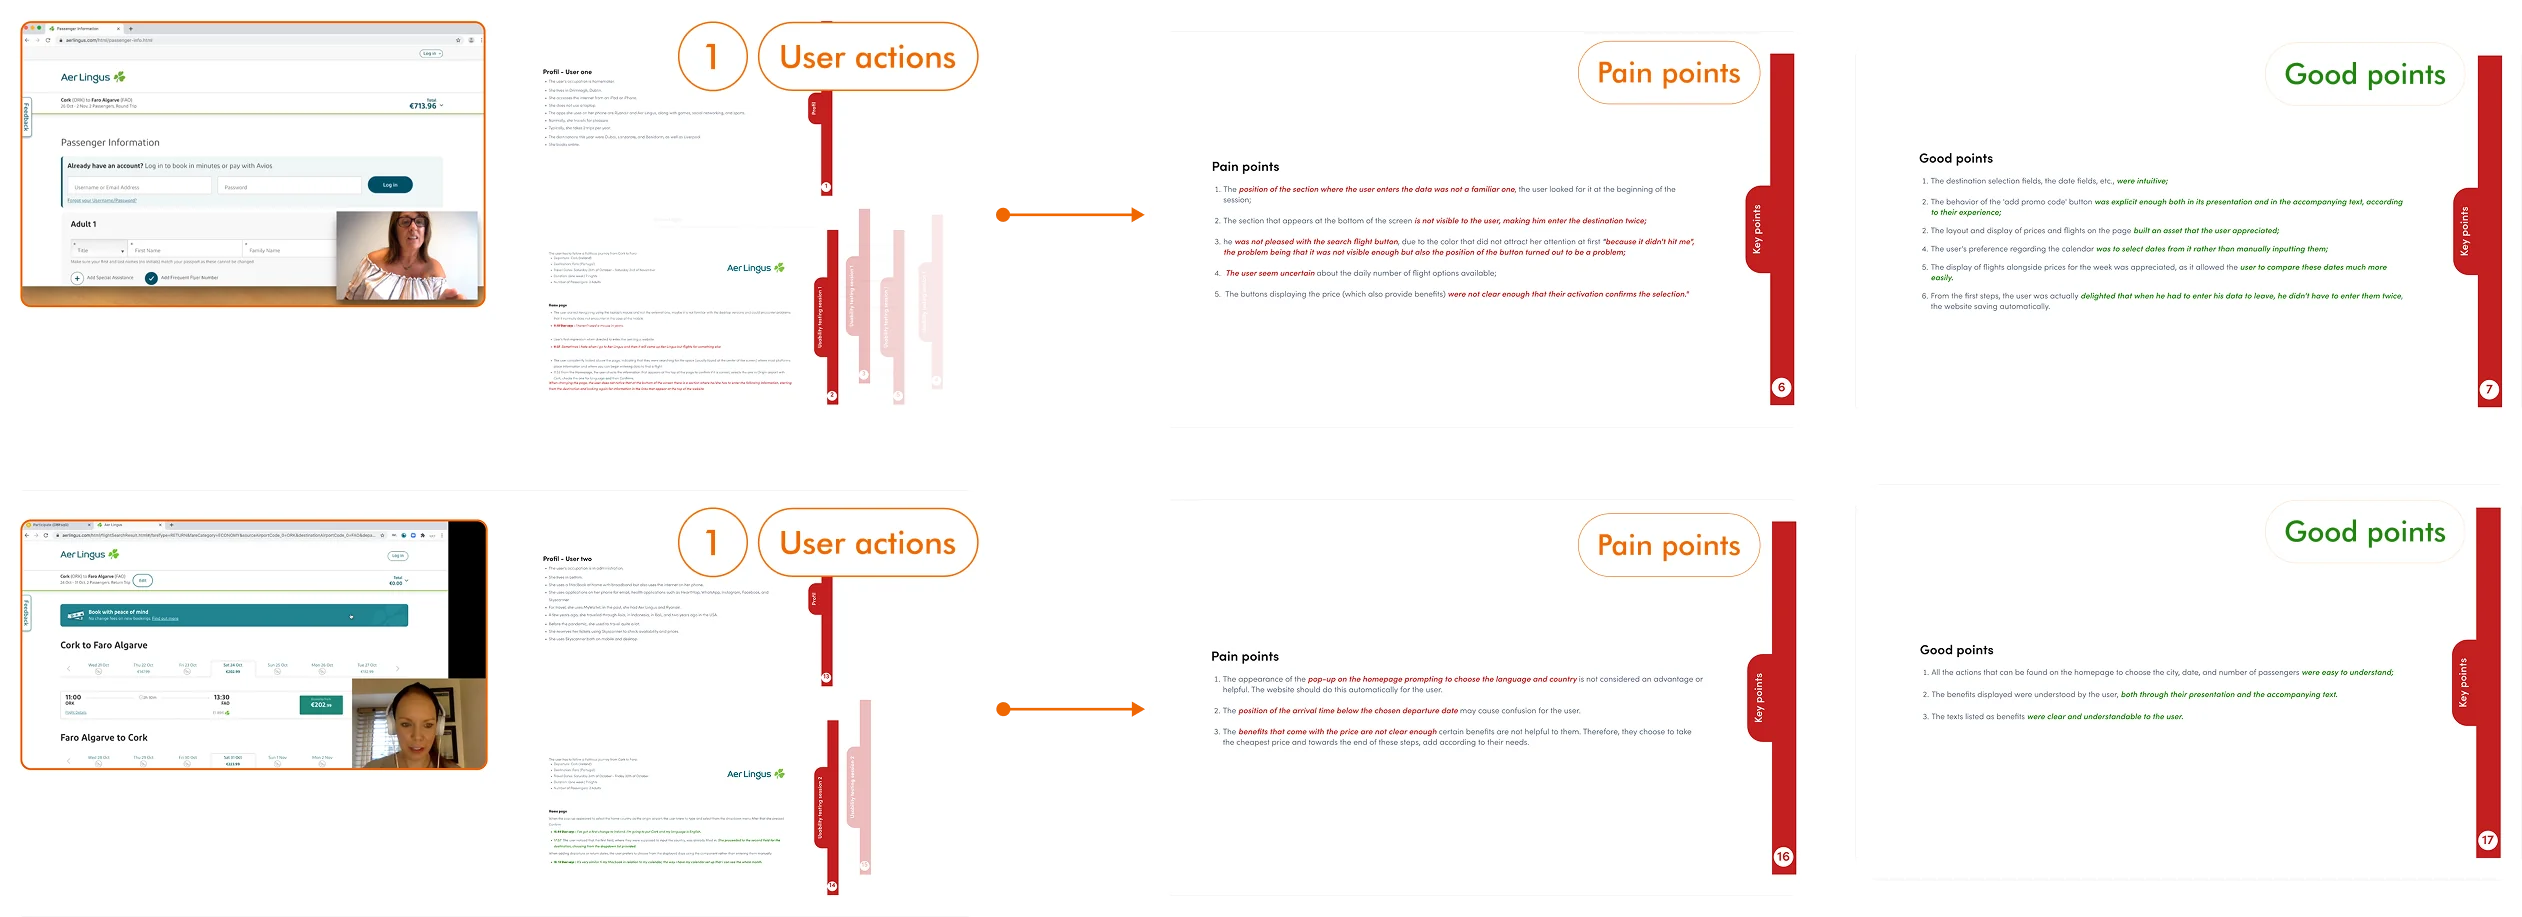
For this case study, I watched two usability tests on desktop, closely. I wasn't just logging clicks: I wanted to know why someone hesitated, what they expected to happen next, and where the interface let them down. That's what turns a recording into something useful: not what people did, but what they were trying to do.

  • Noting every action the user took on the platform.
  • Logging the good and bad moments, each one timestamped.
  • Understanding what the user was trying to do, and why.
Timestamped note-taking log from a usability test recording, separating positive moments from pain points
03 — Research

Usability test

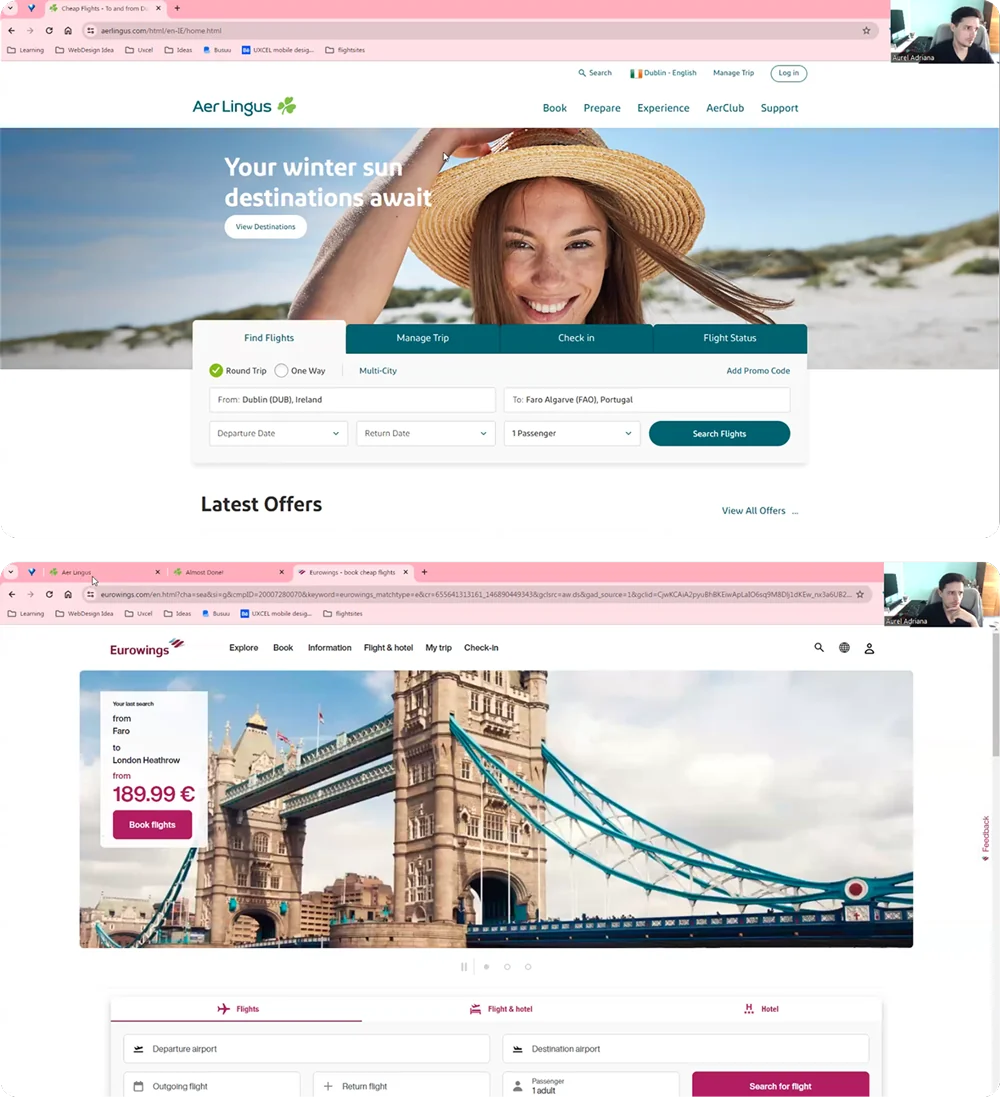
Next, I set up, moderate, and record a usability test. I walk people through specific tasks and watch where they get stuck, what they expect, and how they think the flow should work. That's what tells me whether a design decision actually holds up.

Here's how I approach it:

  • I find a participant, usually a friend, family member, or colleague over 18, using a simple recruitment screener to make sure they fit the target audience.
  • I set up the test environment, in person or remote, and make sure I can record the user's screen, face, and voice, along with my own prompts.
  • I run the test, guiding the user through tasks and comparing two websites or apps to learn about their goals, struggles, and behaviors.
Screen recording of a moderated usability test session, with the participant's webcam and two airline booking sites open in the browser
04 — Synthesis

Affinity diagram

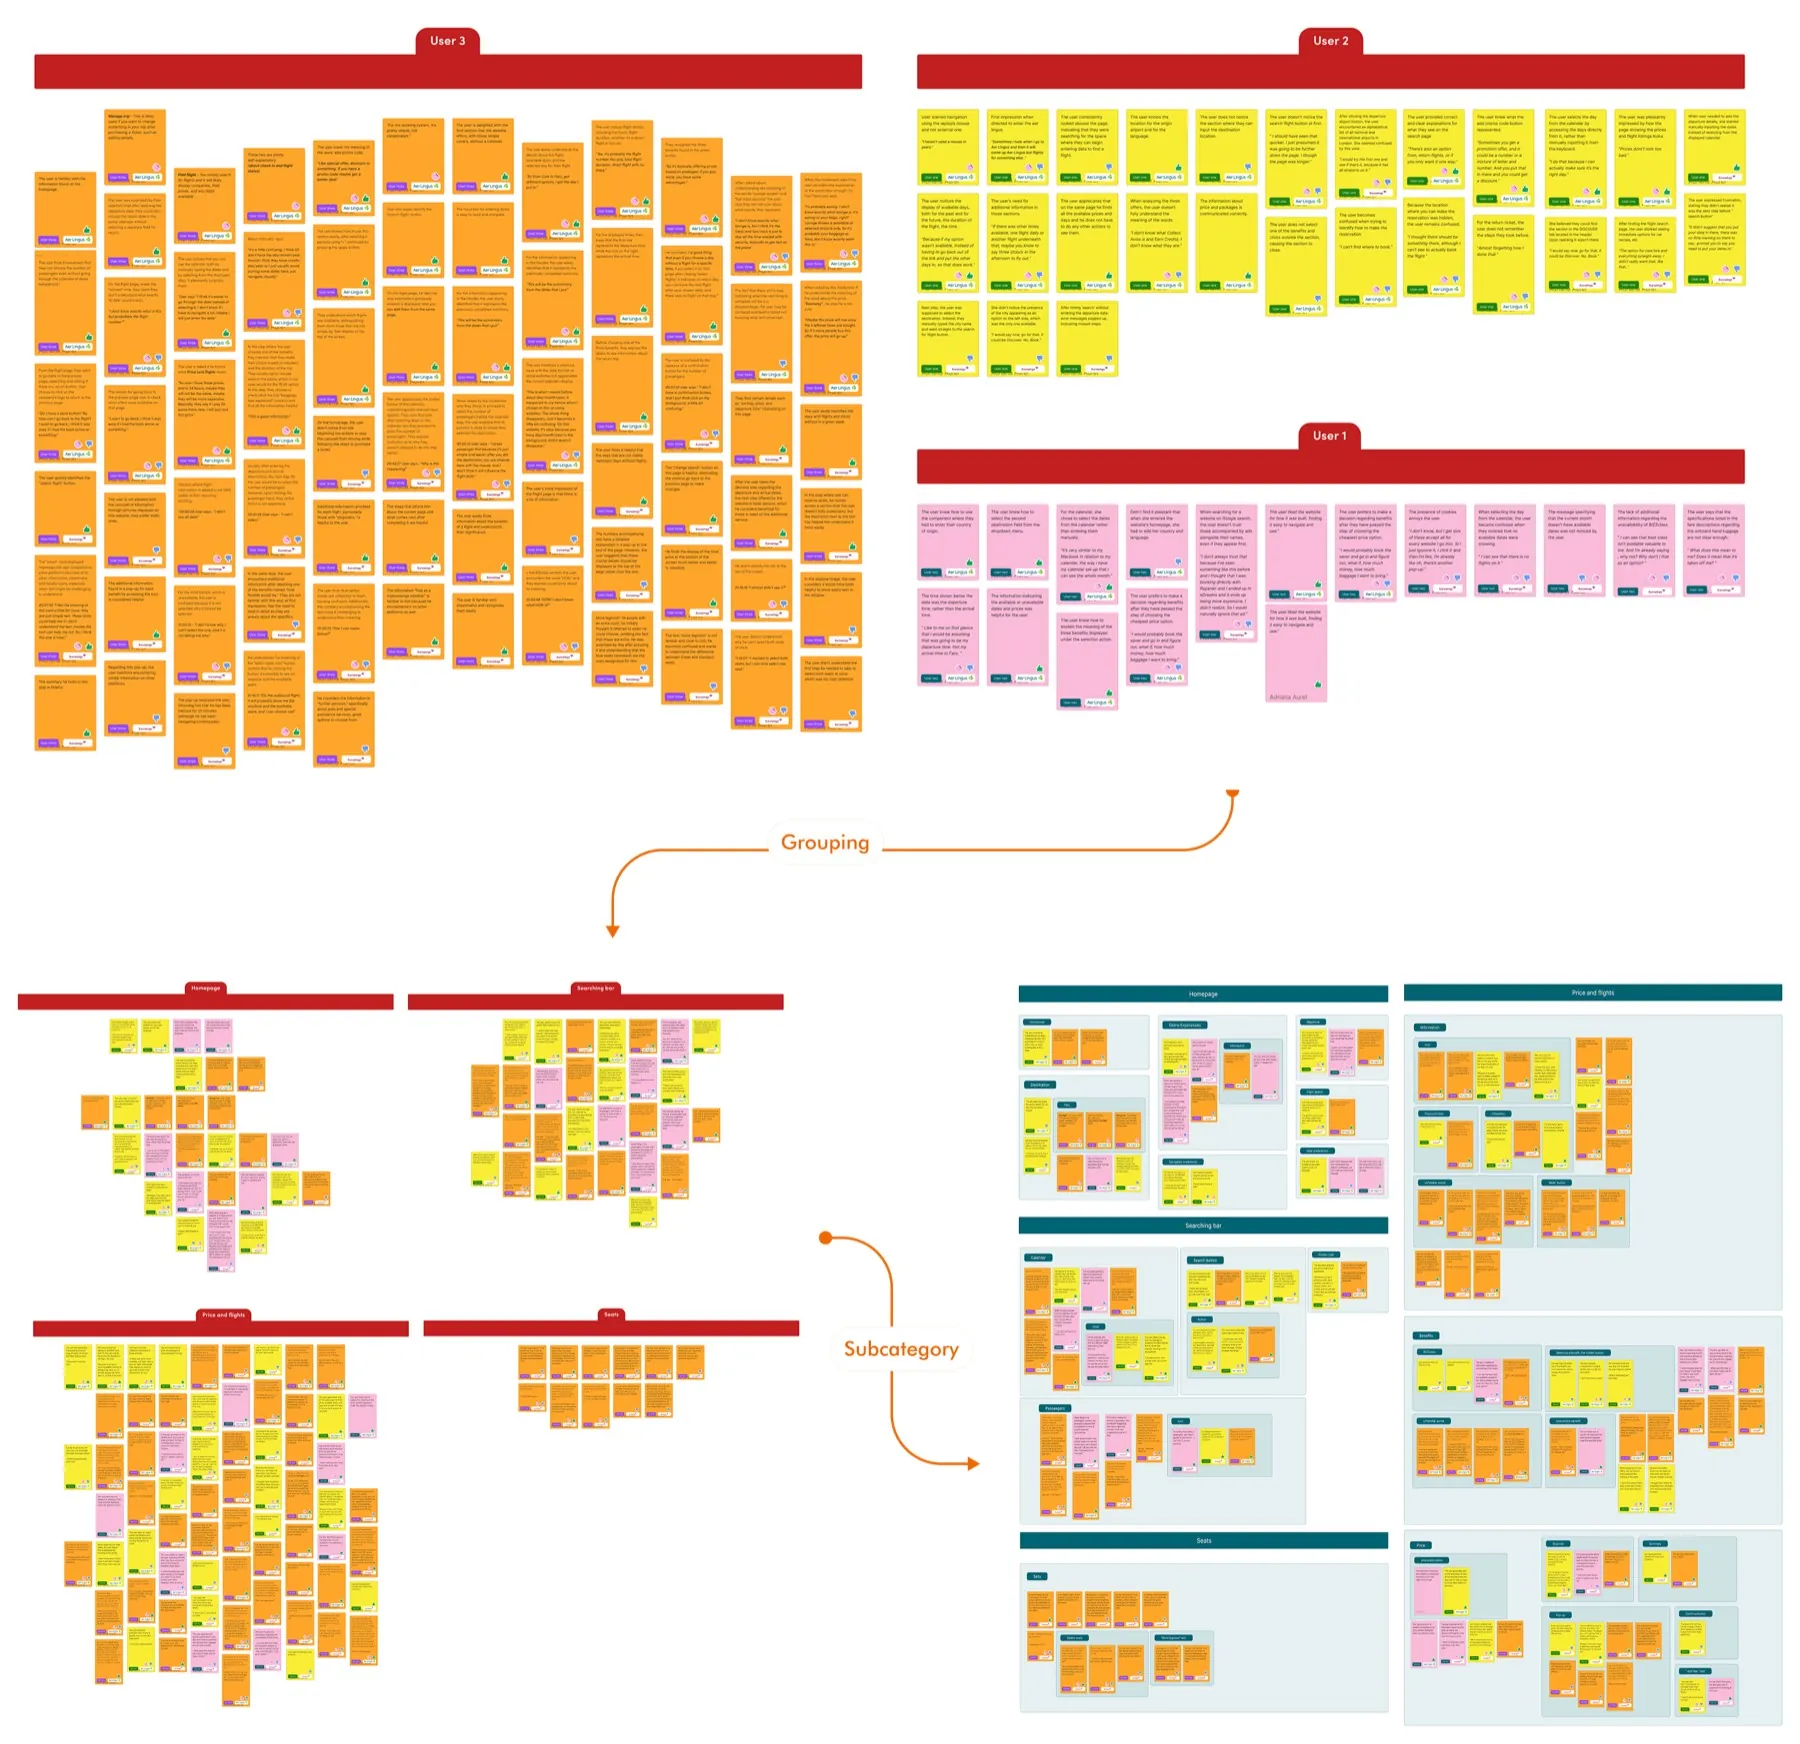
An affinity diagram is how I turn a pile of research notes into something I can actually design from. I start by organizing observations about goals, behaviors, and pain points.

From there, I group the notes that belong together, refine the clusters, and name each one. By the end, the patterns are obvious, and they're what shape the design decisions that follow.

Here's how I approach it:

  • I reviewed the research data and wrote down observations on Post-it notes (one idea per note).
  • Grouped notes into clusters based on what they had in common.
  • Split clusters into subgroups where it helped, and grouped similar observations together.
  • I gave each group descriptive names to summarize the key themes.
Affinity diagram clustering observations from three participants into themed subgroups
05 — Synthesis

Customer journey map

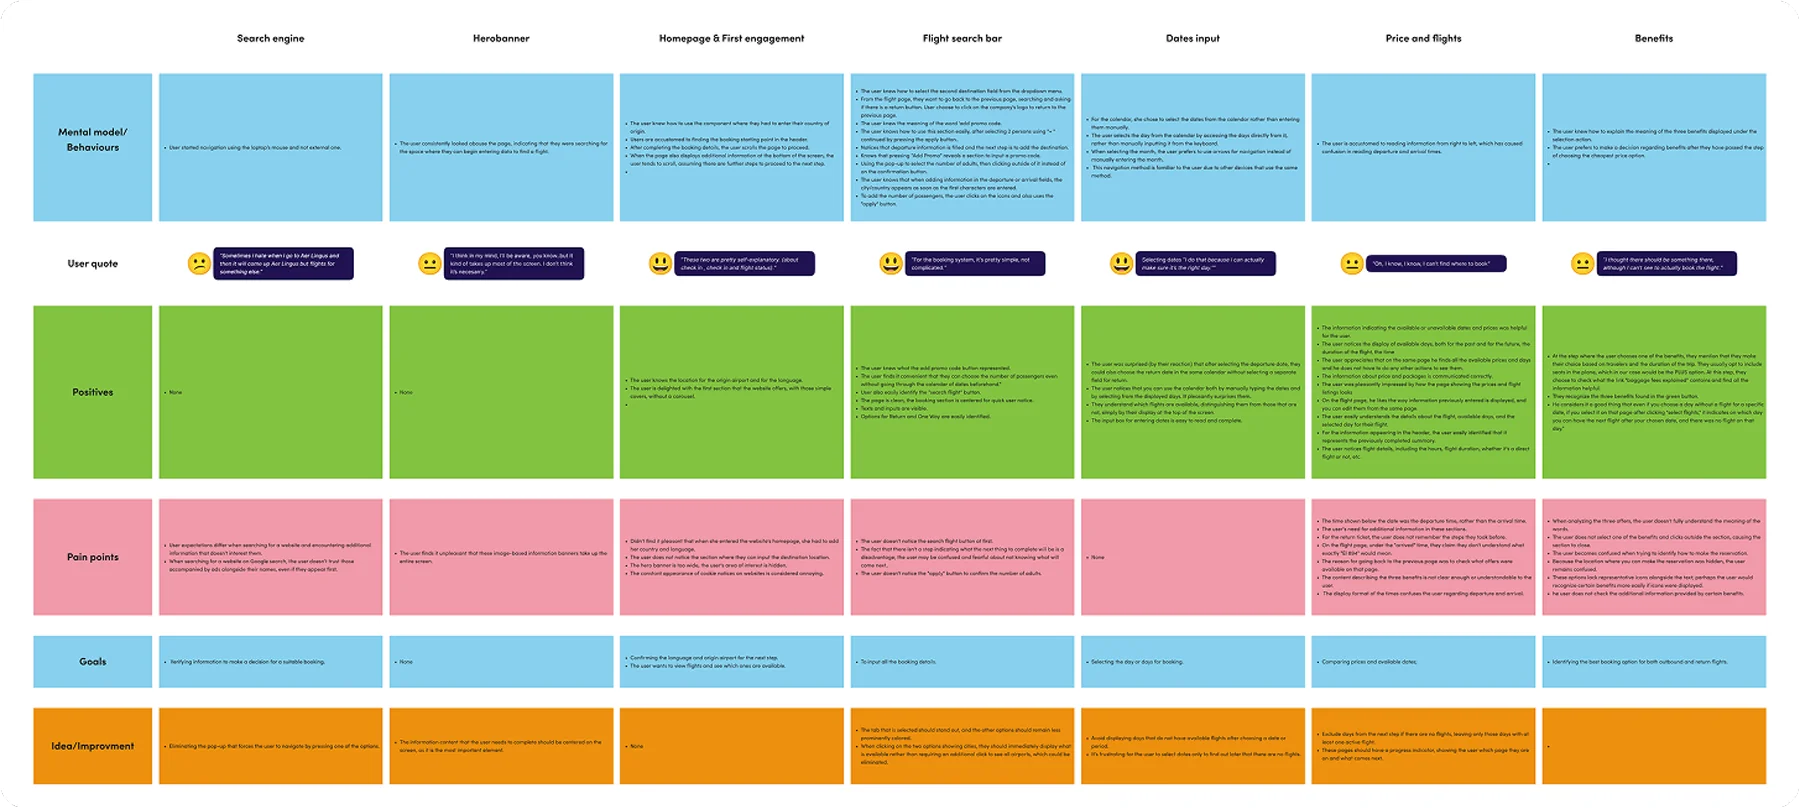
A customer journey map lays out what the user goes through, step by step: what they're trying to do, how they feel, and where it gets hard. I start by outlining the key stages of that journey.

Then I connect what I learned in research to each stage, and refine the map until the pain points and the moments that work stand out clearly. That map is what I keep coming back to when I'm deciding what to fix first.

Customer journey map showing mental models, quotes, pain points and goals across each stage of the booking flow
06 — Structure

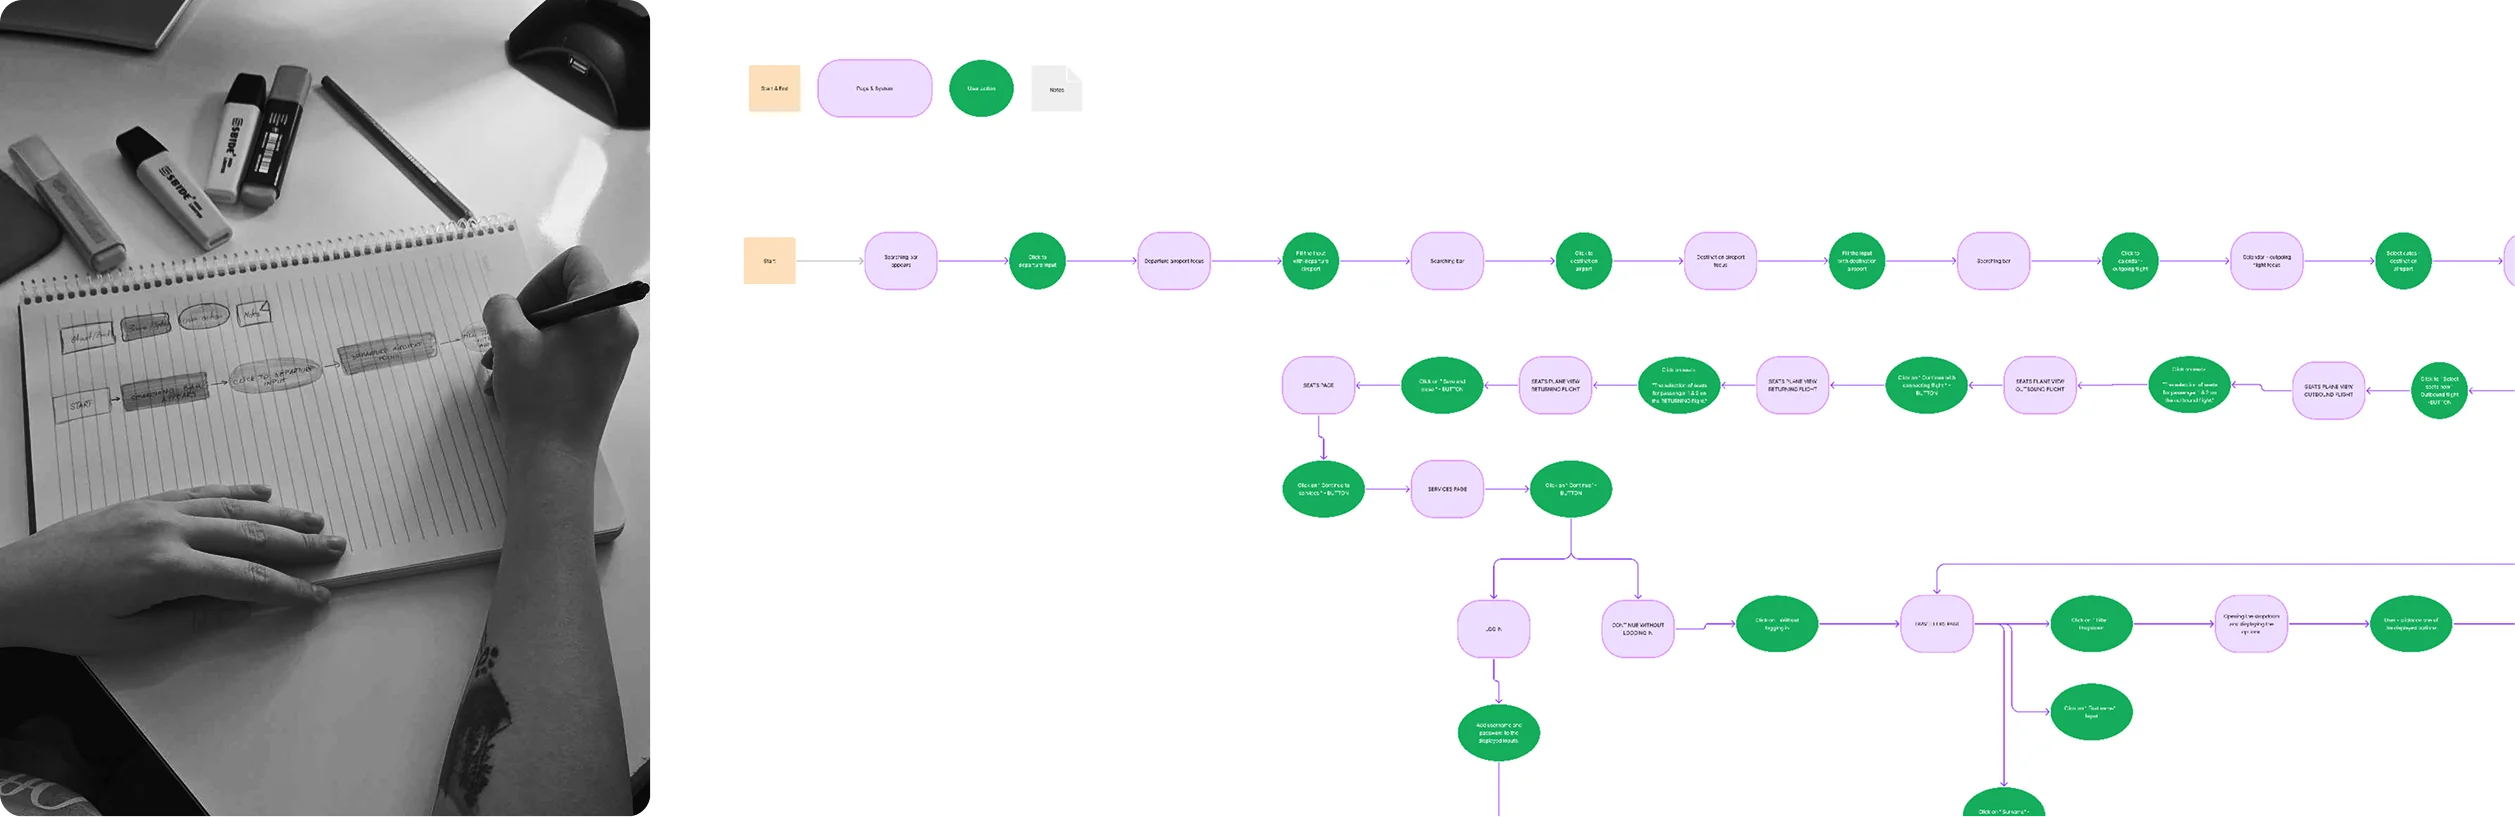
Flow diagram

I start by sketching the user flow on paper, step by step. For this flow, I mapped a scenario that begins with logging into the platform and ends with a completed ticket purchase.

I mapped every interaction along the way, from login to browsing ticket options, selecting a ticket, and completing the purchase, so there's no point where the user has to guess what comes next.

That level of detail is what surfaces the obstacles before they become real problems, and makes sure the design actually gets people to their goal.

  • Orange shapes (Start/End): Represent the entry and exit points of the flow.
  • Purple shapes (Page & System): Indicate pages visited and system interactions (e.g., login page, ticket selection screen, and system prompts).
  • Green shapes (User Actions): Highlight user-driven actions at each step (e.g., entering login details, searching for tickets, or clicking "Purchase").
Digitized flow diagram from login to completed purchase, with entry/exit, system and user-action shapes
07 — Structure

Wireframes

Next came wireframes: rough sketches of the product that show how everything works, without getting distracted by color or fonts yet.

For this project, wireframes let me lay out the flow visually: the search bar, ticket options, purchase buttons, all placed so they're easy to find and use. The goal was simple: nothing in the way of the next step.

Wireframes also made it fast to test different layouts and ideas, and to catch what worked (and what didn't) before moving into polished designs.
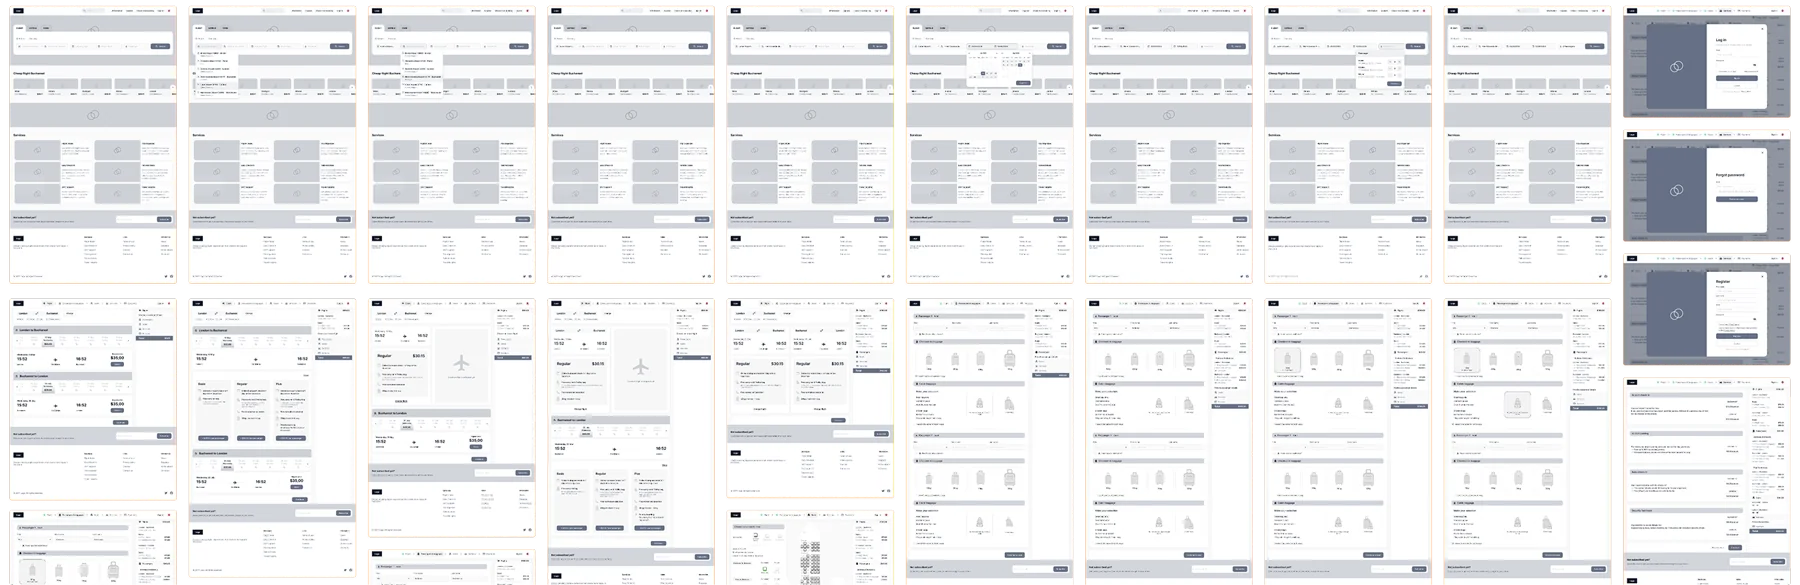
Low-fidelity wireframe set covering the booking flow from homepage search through passenger details and login
08 — Visual design

High-fidelity design

After refining the wireframes, the next step was high-fidelity design: adding color, typography, imagery, and all the details that make a screen feel finished.

Hi-fi designs are close to the final product: they show exactly how it will look and feel. For this project, I focused on a clean, user-friendly interface where every element served the flow, not just the look of the page. This is the stage where it has to work and look right at the same time.
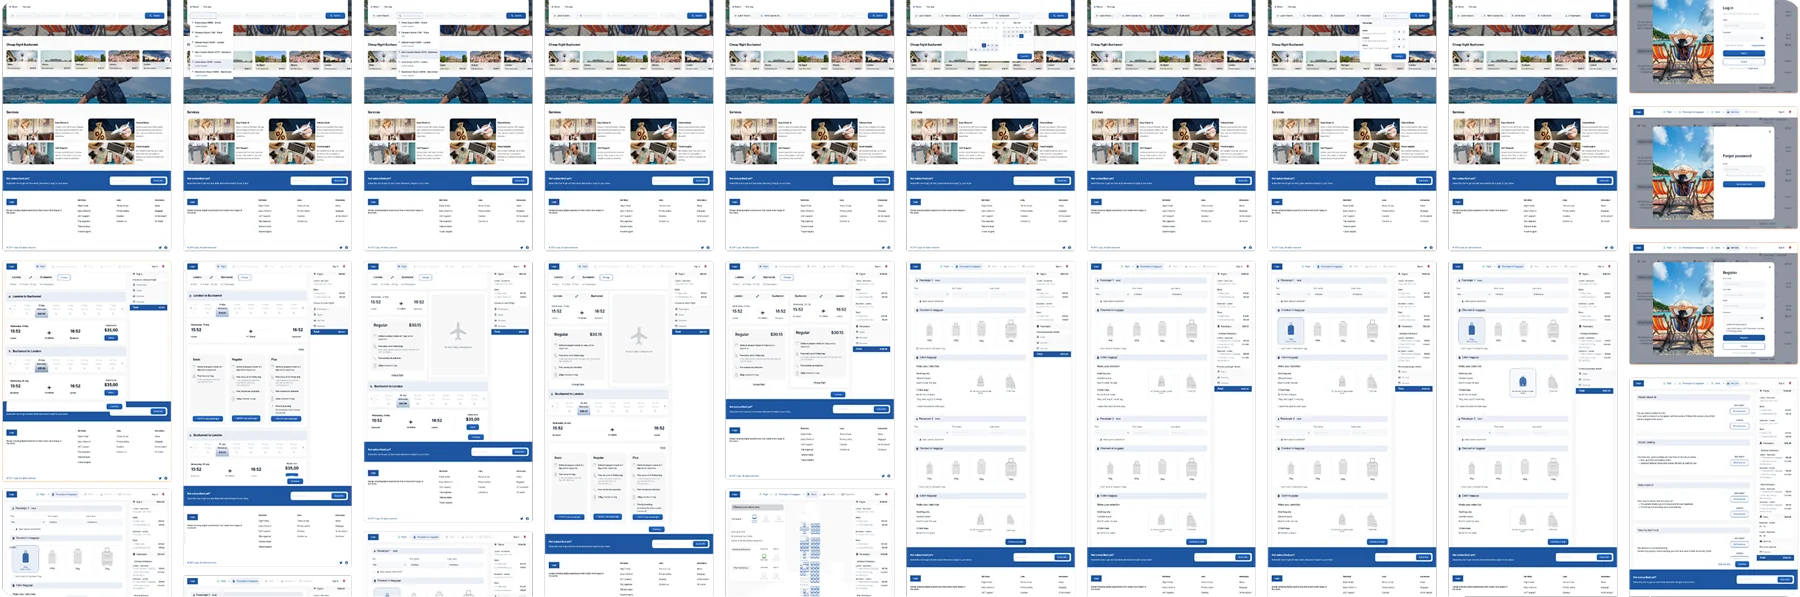
High-fidelity screens of the redesigned booking flow with final color, typography and imagery
09 — Interaction

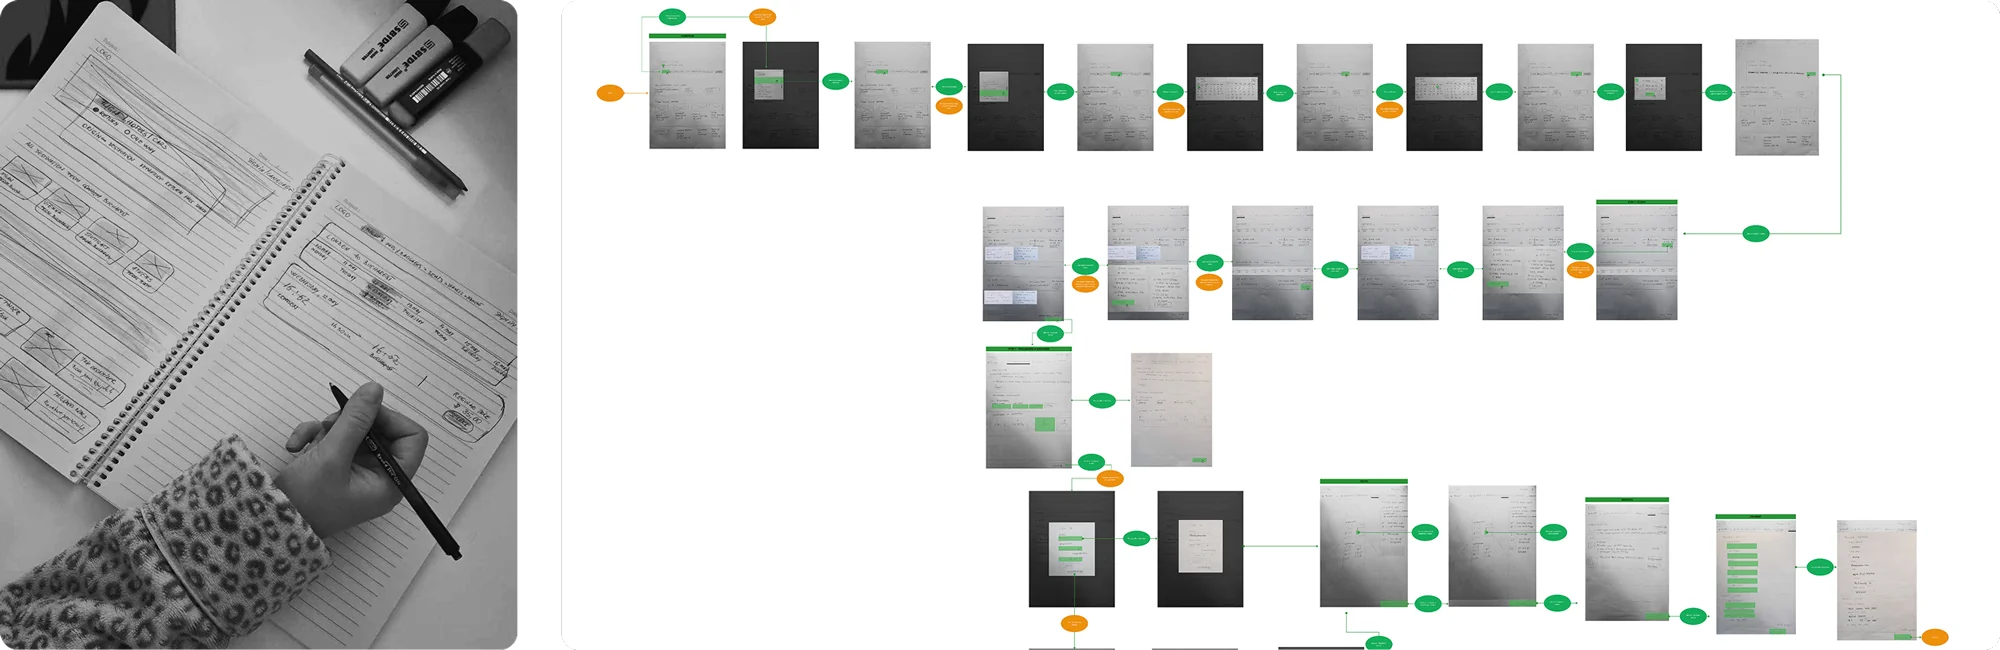
Interaction design

I start with pen and paper. Sketching ideas in their simplest form is the fastest way to explore how something will actually work, no pressure to get it right the first time.

These quick sketches let me test and tweak ideas before committing to a digital prototype. I go through several iterations, looking for what works best, without getting stuck on details too early.

Focusing on functionality first keeps the designs practical and ready for development. Interaction design is really about making something that works the way people expect it to, and this is where that gets built in.

Interaction flow diagram connecting paper sketches to digital screens, showing user actions and system responses at each step
10 — Interaction

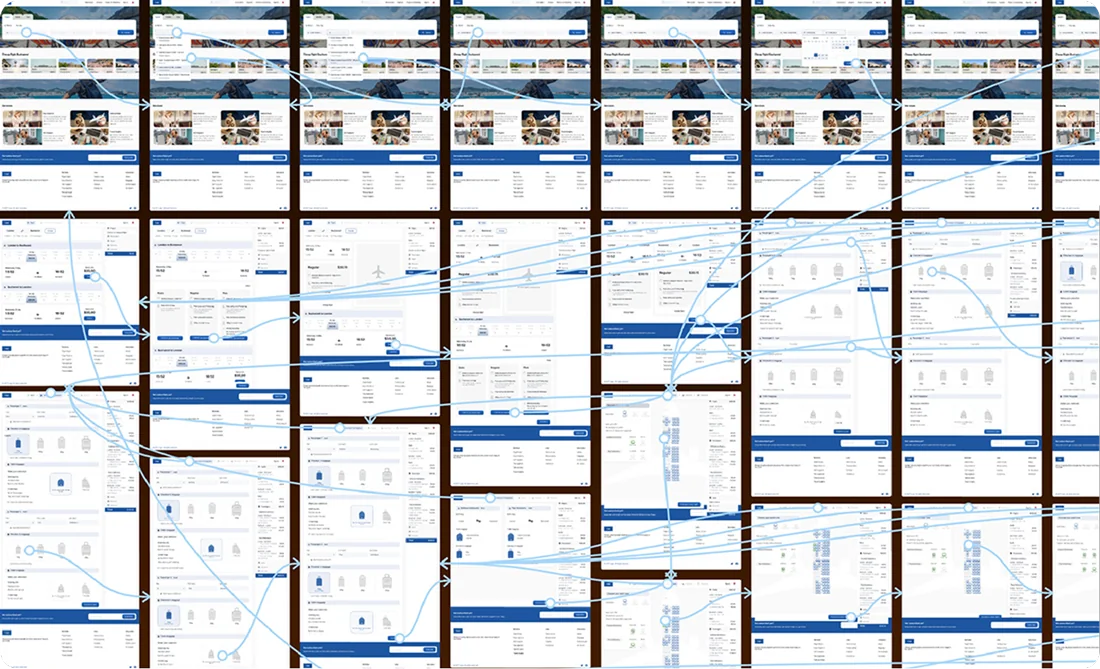
Prototype

Once the hi-fi designs were done, the next step was prototyping: adding the interactions that turn static screens into something people can actually click through and test, like the real product.

I focused on smooth transitions and interactions that don't need explaining. Prototyping is where I get the closest look at how the product will actually feel before it's built.

Connected high-fidelity screens forming the clickable booking flow prototype
11 — Handoff

Annotations

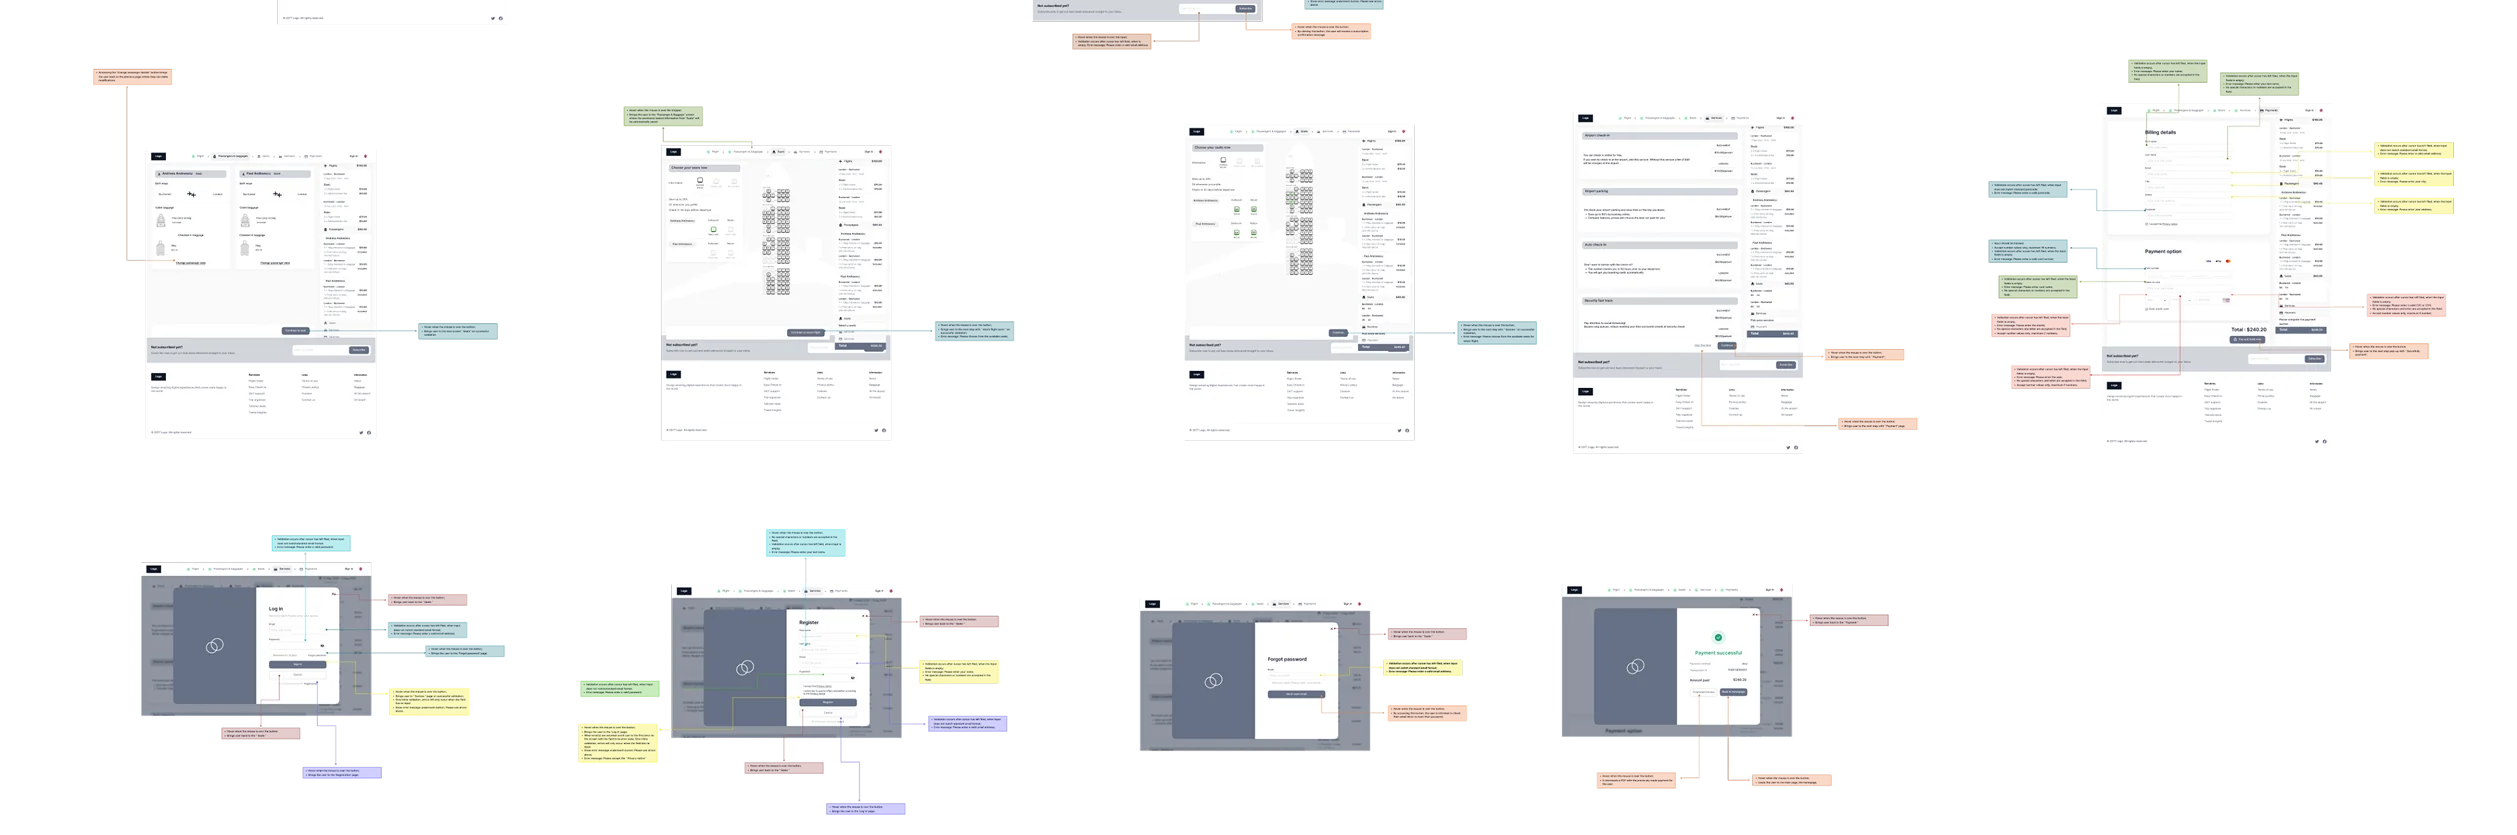
The final step was adding annotations to the designs to guide development. These notes detailed how each screen and element should function, starting with the homepage and booking summary.

I added them as a separate layer or as Figma comments, covering functionality, transitions, and navigation. Clear enough that a developer could build from them without having to guess.

Annotated high-fidelity screens documenting functionality, transitions and navigation for development handoff
12 — Outcome

What changed

Faster through the flow

Users now identify the actions available to them right away, so they get through the booking flow and complete their purchase faster. No more scanning the page and guessing where to start: the next step is always visible.

Search comes first

The change that carries most of that weight lives in the hero banner: the destination search is the first thing you see and can use the moment the page loads. It's the component every traveler actually comes for. In the usability sessions I ran, people found their destination faster with this pattern than on the platforms we tested that didn't use it.

Have a flow with the same kind of friction?

This is the kind of problem I like solving. Reach out and let's look at yours.